Add the DNS records at your domain provider
Add the two records for your custom domain at GoDaddy, Namecheap, Squarespace, IONOS, OVH, TransIP or Cloudflare, and send the root domain to www.
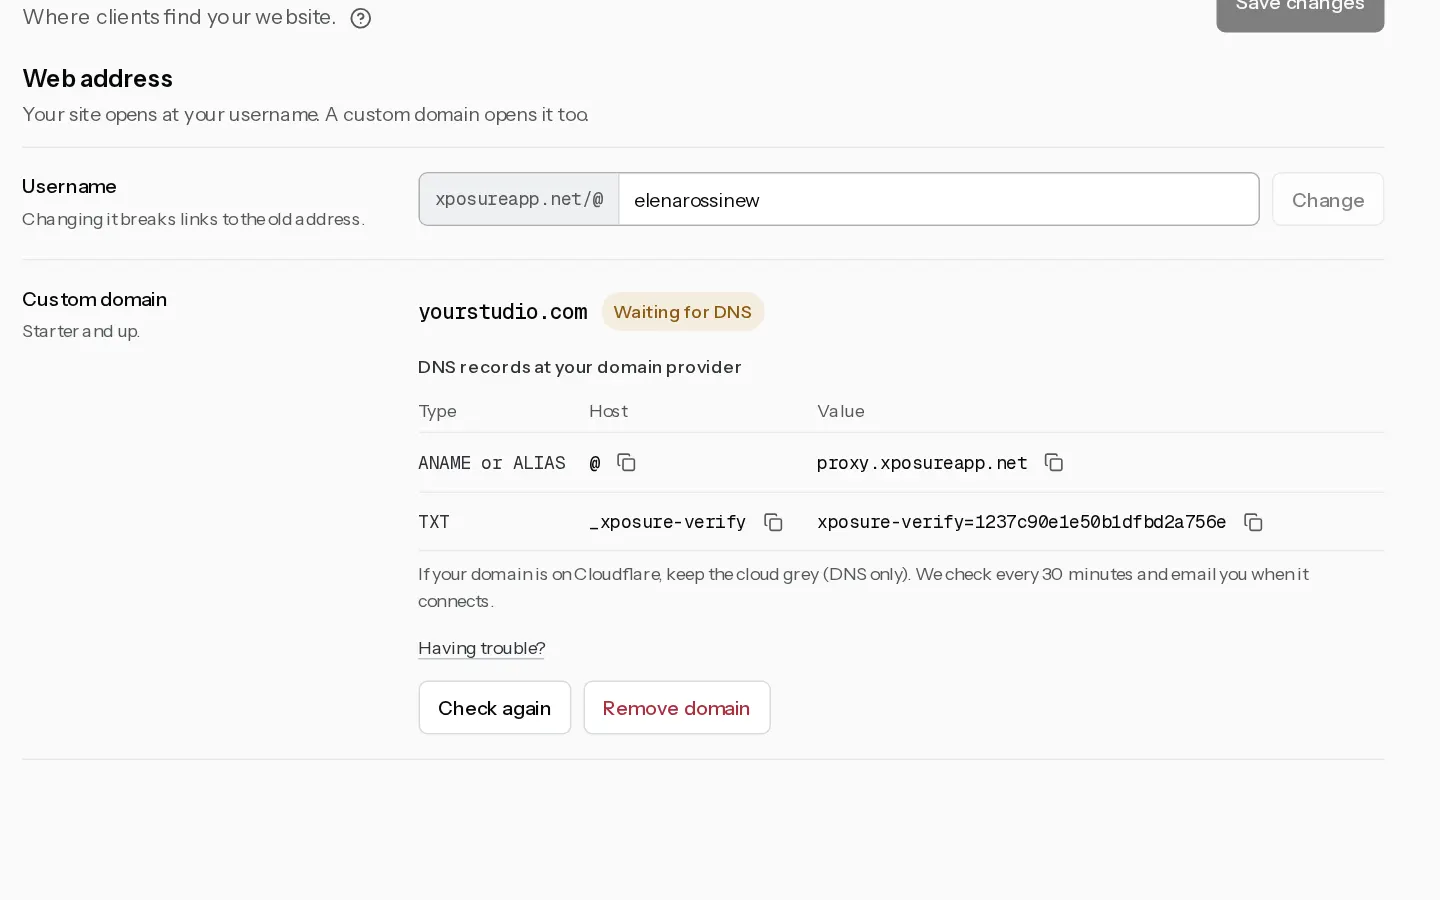
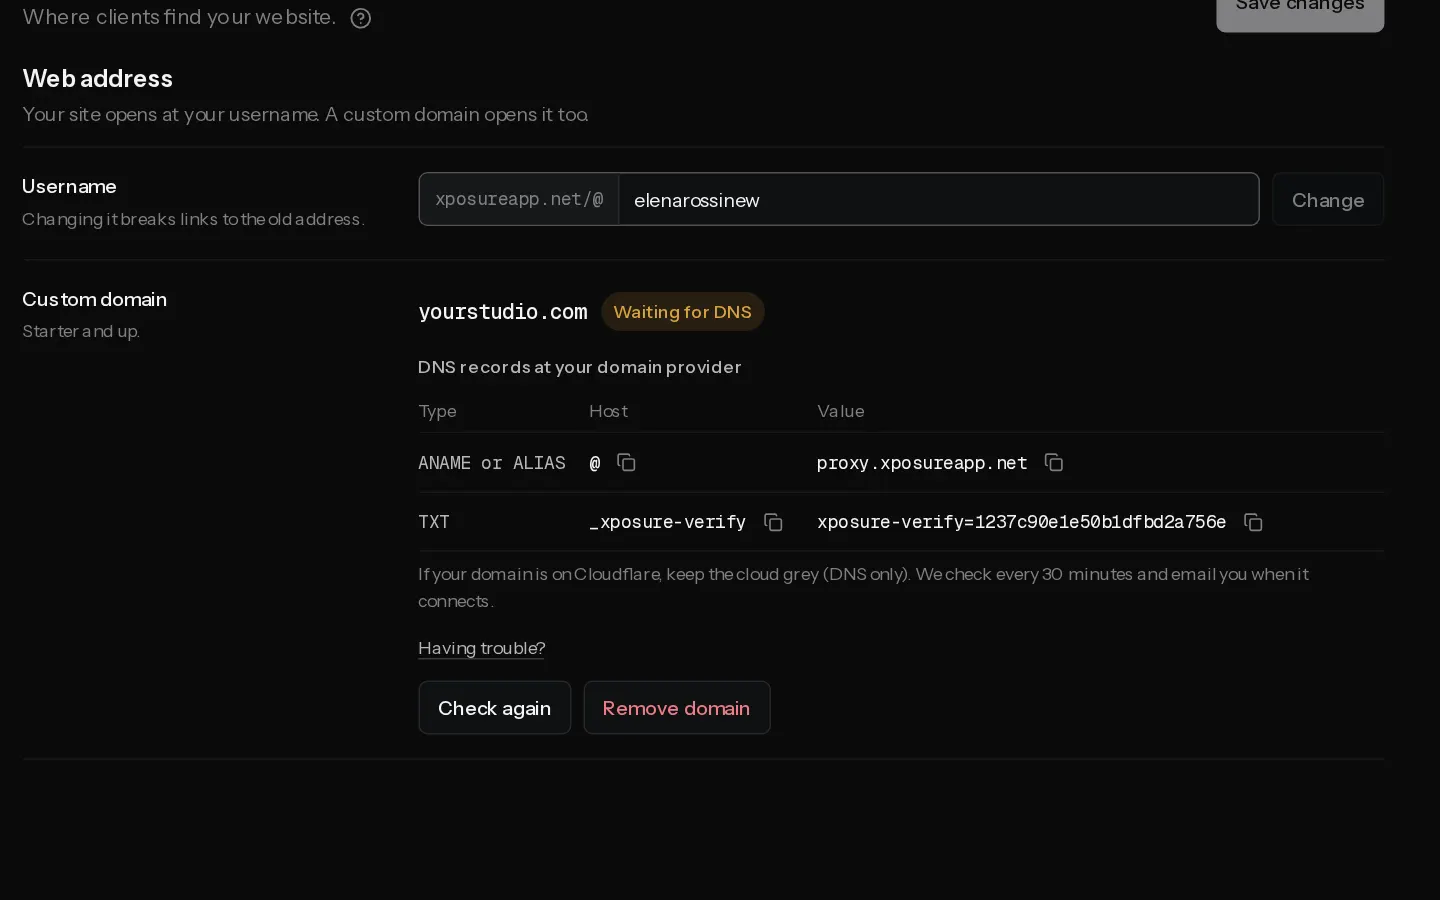
After you save a custom domain, the Domain page shows two records. You add them at the company where you bought the domain, or wherever its DNS is managed. Start with Connect a custom domain if you have not saved the domain yet.
The two records
For www.yourname.com they are:
| Type | Host or name | Value or target |
|---|---|---|
| CNAME | www |
proxy.xposureapp.net |
| TXT | _xposure-verify |
the code starting xposure-verify= from the Domain page |
Copy the TXT value from the page. It is different for every account.
Most providers ask for the host without your domain, as above. If yours shows the full name in its other records, type www.yourname.com and _xposure-verify.yourname.com instead.
Important: A host can have only one CNAME, and no other record beside it. If
wwwalready has a record, such as a parking page or your old website, edit it or delete it before you add yours.
At your provider
Menu names change from time to time. Look for DNS, DNS records or DNS zone on your domain.
- GoDaddy: open your domain and select DNS. A new domain already has a
wwwCNAME pointing to@: edit that one and change its value. - Namecheap: open Domain List, select Manage next to the domain, then Advanced DNS. Delete the
wwwrecord pointing to the parking page, then select Add new record. - Squarespace Domains, including domains moved over from Google Domains: open the domain, then DNS. Remove the Squarespace defaults if they include a
wwwrecord, then add yours under Custom records. - IONOS: open Domains & SSL, select the domain, then DNS. Delete any A or AAAA record on
wwwbefore you add the CNAME. - OVH: open Domain names, select the domain, then the DNS zone tab and Add an entry. Delete any A record on
wwwfirst. - TransIP: open the domain and find its DNS settings. End the value with a dot,
proxy.xposureapp.net., or TransIP adds your domain to the end of it. - Cloudflare: open the domain, then DNS and Records. Set Proxy status to DNS only, the grey cloud. The Domain page may show Add to Cloudflare, which adds both records for you.
New records usually show within minutes, sometimes up to an hour. Select Check again on the Domain page.
Send yourname.com to www
Visitors who type yourname.com without www should land on your site too. Most providers call this Forwarding or Redirect, on the domain's own page rather than among the DNS records. Forward yourname.com to https://www.yourname.com, as a permanent (301) redirect.
On Cloudflare, and at a provider that offers an ANAME or ALIAS record, you can connect the root domain itself instead. See Connect a custom domain.
Did not find your answer?
Tell us what you are trying to do. Support replies by email.